Loading
Connecting your website or applications with Facebook user login api will provide a great opportunity for you to gain new users. Now, all of us connect our existing social media accounts when logging into a new website or applications, making it easier for us to register in a new application without entering a password.
In this regard, Facebook login api solves our business. It allows user login on our website with Facebook API key and Facebook secret key acquisition processes. In this article, I will show you how we can connect our website with Facebook user login by logging into Facebook Developer account.
Facebook Login Api Setup
The first actions we will do are to go to the url for the developers opened by Facebook with our Facebook account.
After clicking on the link above, you will be greeted by the screen in the picture below.

- In this section, click on the "My Apps" heading at the top right.
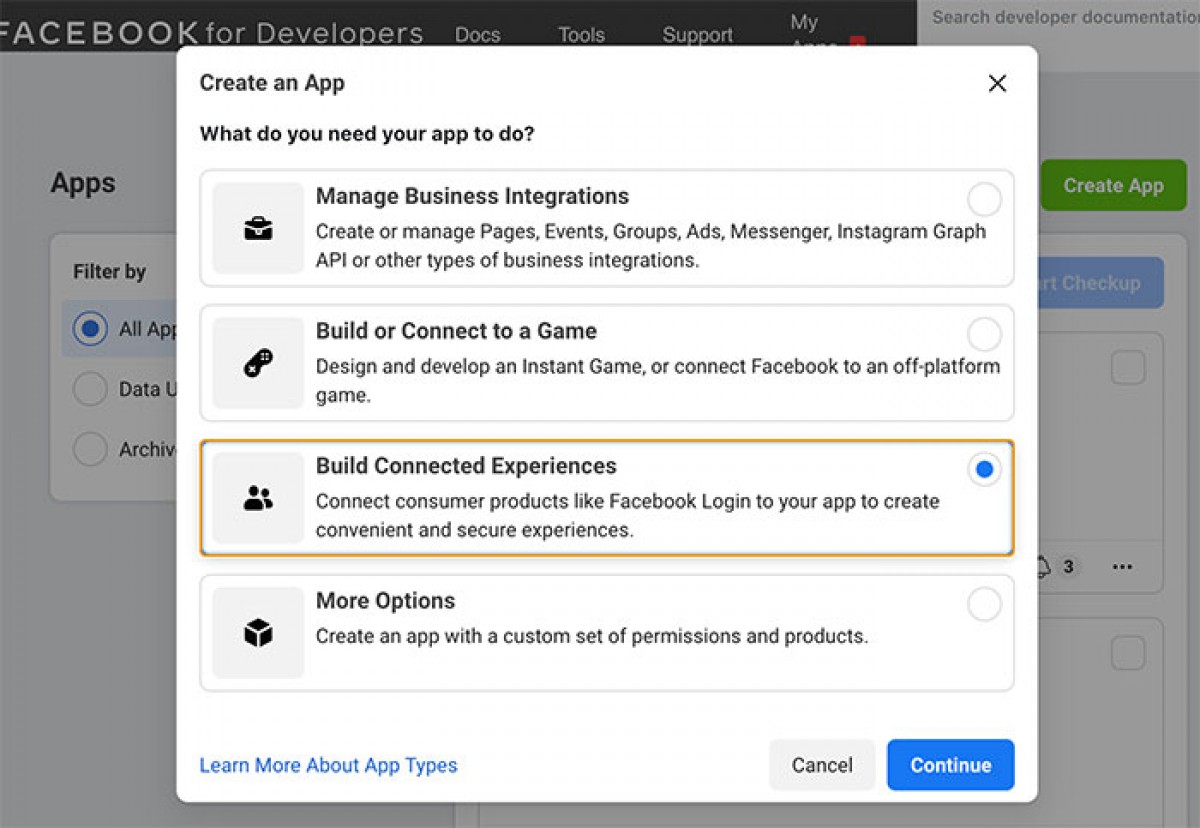
- From the next screen, find the "Create App" button and click it.

- From this section, we should connect by selecting the section for Consumers. In the option we will choose, we should pay attention to the fact that "Facebook Login" is written.
- In the form that will appear in the next step, enter the name of your application and the contact e-mail address, then proceed to the next option and press the "Create App" button.

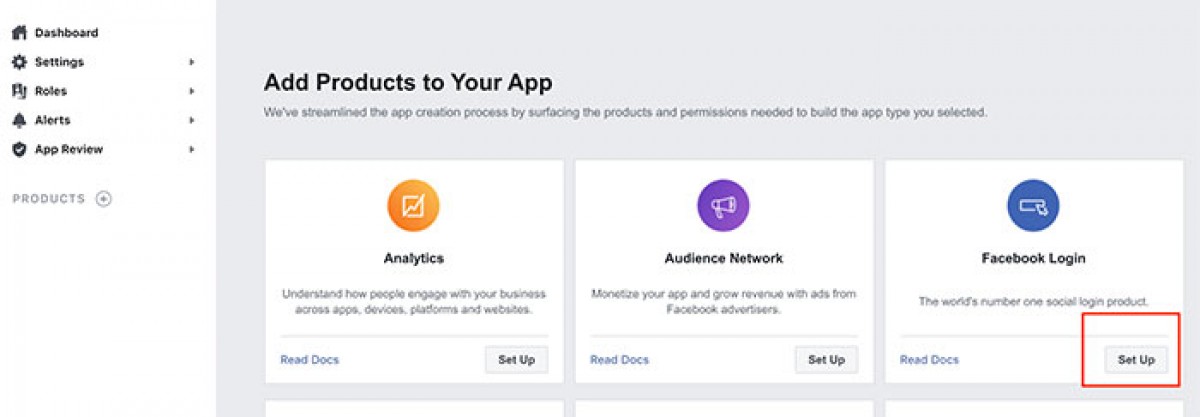
- Afterwards, we need to proceed by selecting the "Facebook Login" option from the options that appear on the screen.
- After this part, you will be asked to choose your platform option that you will use for the Facebook Login Api connection process on the screen that comes up. We will choose the "Web" option because we will connect the website in the process we will do.
- In the next tab that comes up, we just enter the address of our website under the title of "Site Url" and save it by saying "Save".

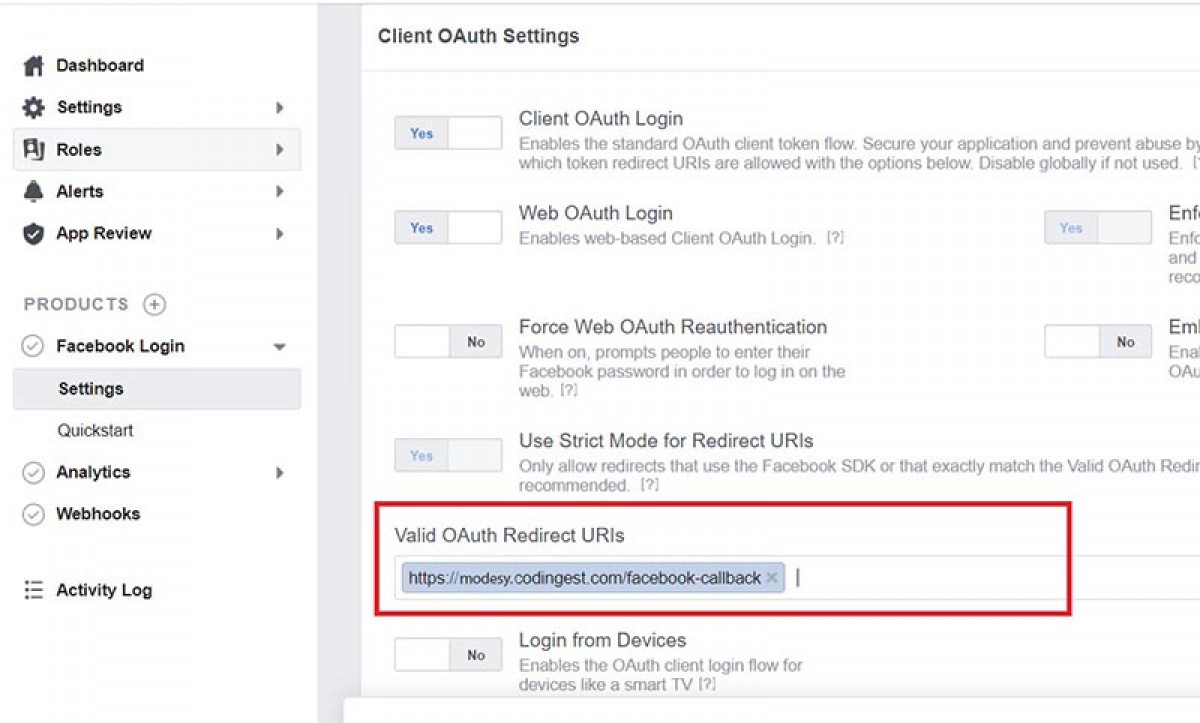
- Then, under the "Facebook Login" heading from the menu on the left, click "Settings" and enter the return address for your site.
- After saving the changes, make sure that the "public_profile" and "email" options are active by clicking on the "Permissions and Features" title under the "App Preview" heading in the left menu.
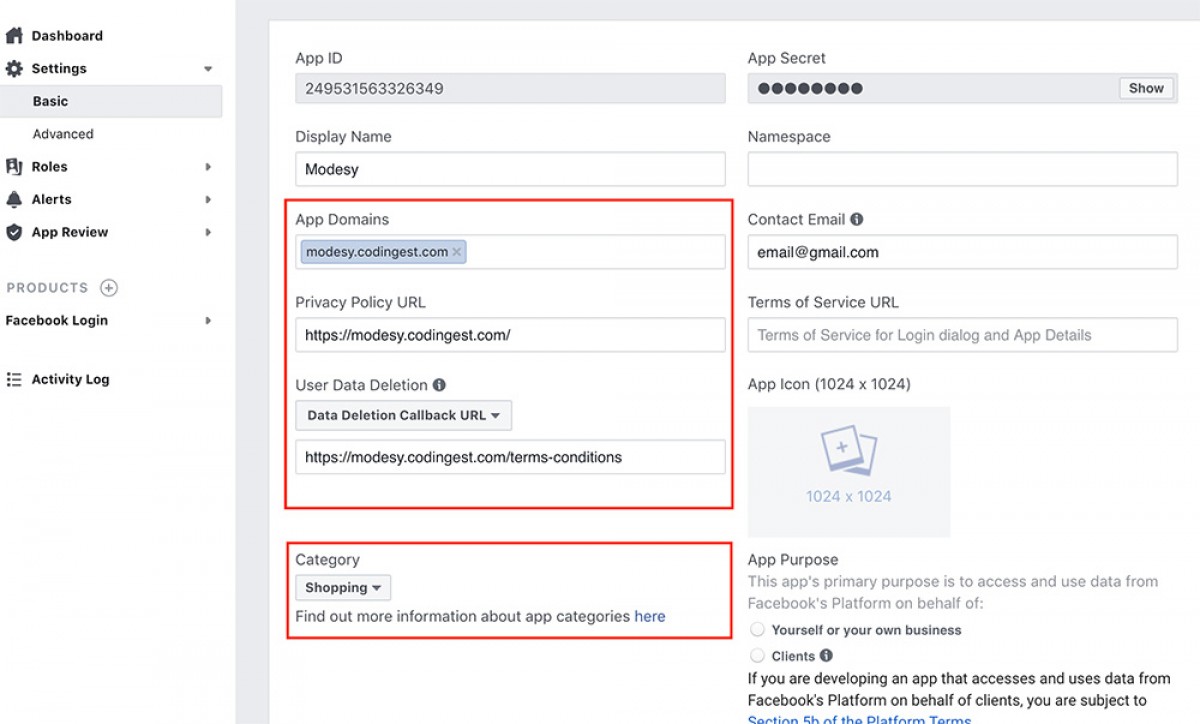
- Now we can click on the "Basic" option under the "Settings" heading from the menu on the left and make the final adjustments.

- From this section, fill in the "App Domains", "Privacy Policy Url", "User Data Deletion" and "Category" headings accordingly.
- Now, after filling them, we only have one name left, which is to change it to "Live" by pressing the "In development" option at the top to activate the application.
Do You Need a Digital Solution?
The most suitable digital solutions are at Gefsun Digital.
Please contact us to get a quote.
